Christmas Round the Corner????

image

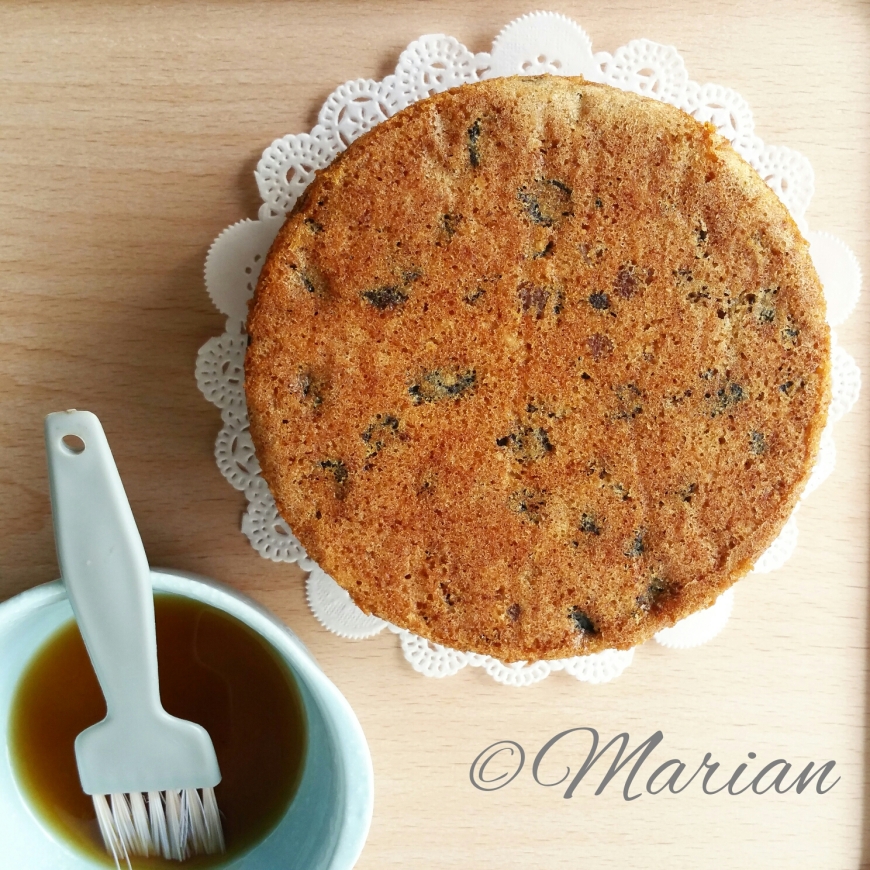
Before you know it, it’s almost the end of the year. Christmas is coming in about 3 months time, and so, it’s about time to make some fruitcake to cure. Made 6 to gift, and 2 to keep for Christmas parties held at home. 8 in total. The fridge is packed.

If you are like me, and you are looking to either have some fruitcake during Christmas, or to gift these to friends and family, then now is the time to make them. 🙂

Recipe is taken from Anna Chan of Sugar Inc.

Ingredients:

Group A:

200g Dried Fruits

400g Grand Marnier/Gold Barcardi

Group B:

75g Good Quality Butter

60g Fine Sugar

1tsp Mixed Spice

1 tsp Vanilla Essence

Group C:

1/4 tsp Bicarbonate Soda

2tsp Orange Zest/Lemon Zest

50g Good Quality Butter

13g Whipping Cream

Group D:

100g Eggs

150g Cake Flour

1.5tsp Double Acting Baking Powder

Method:

  1. Soak dried fruit and rum overnight. Do not soak longer than 12 hours, or fruit may be too alcoholic and bitter
  2. Cook 255g of Group A ingredients (all the fruits and part alcohol) with Group B ingredients in a saucepan over medium heat. Cook until butter is half melted. Turn off the heat and continue stirring until the butter has completely melted and mixture is even. Cover the mixture with a lid to prevent too much alcohol from evaporating.
  3. Stir in Group C ingredients, one at a time, into the above mixture. Keep mixture under wraps constantly.
  4. Sieve cake flour, and double acting baking powder together. When the mixture is cool, stir in the eggs, followed by the flour mixture.
  5. Divide the batter into 2 4/5 inch greased cake pans. Each pan should contain around 370g of batter.
  6. Bake at preheated oven, 170C for 25 mins.
  7. Test the cake with a wooden skewer for doneness. Brush the cake with the remaining rum liquid from Group A whilst the cake is still hot.
  8. Cover the cake with aluminium foil. Brush the cake weekly with rum for a month, and bi-weekly for the next 2 months, and monthly thereafter. Cake keeps 6 months in the fridge. Keeps for 1 year in the freezer.
  9. Please heat up the cake at 160C for 5 mins when you want to eat it.

Happy baking. 🙂
Not Your Average Mooncakes

image

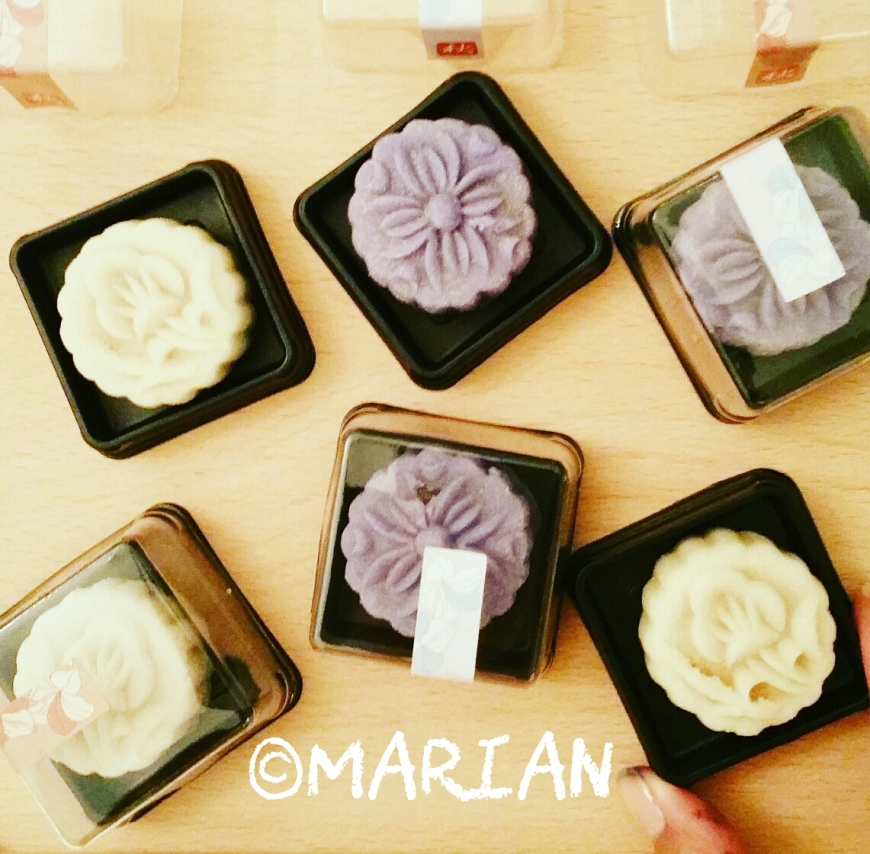
Moonies this year were a little different. No usual white lotus paste with melon seeds. Instead we have the awesome HK milk tea snowskin mooncakes, and Passion fruit snowskin mooncakes.

I was a little apprehensive getting the pastes from Kwong  Cheong Thye, as I’ve not heard about them before, but it all turned out well. Everybody loved these refreshing new taste. Plus, it’s low sugar. Extra yums. 🙂

These snowskin mooncakes generally stays soft for 3 days. However, as there are no preservatives, they tend to start turning hard 4th day onwards. So if you want to make these as gifts, please make them just a day before, so that they can eat them over the next few days. 🙂

Kwong Cheong Thye Address: 1 Lor 27 Geylang, Singapore 388186

Snowskin mooncakes recipe adapted from “Our Sweet Kitchen – cakes with an Asian flair” by Chi Anh Dao and Hoang Anh Nguyen

Ingredients
200g kou fen
200g icing sugar
100g shortening
200g ice Cold water

Method
1. Mix kou fen and icing sugar together
2. Add shortening and rub into the mixture till thoroughly combined.
3. Add ice cold water and stir with fingers till dough is formed
4. Add coloring
5. Rest the dough in the fridge for at least 30mins
6. Depending on your mould, take sufficient amount of the dough, place it between 2 transparent sandwich bags and roll it out to about 5mm thick. Using the transparent bag from which the dough got stuck on to, slowly wrap it round the paste and Peel it away as you wrap it around.
7. Dust it with kou fen and press it into the mould.
8. Knock all 4 sides of the mould and remove the moon cake.

Happy baking guys. 🙂
Marian

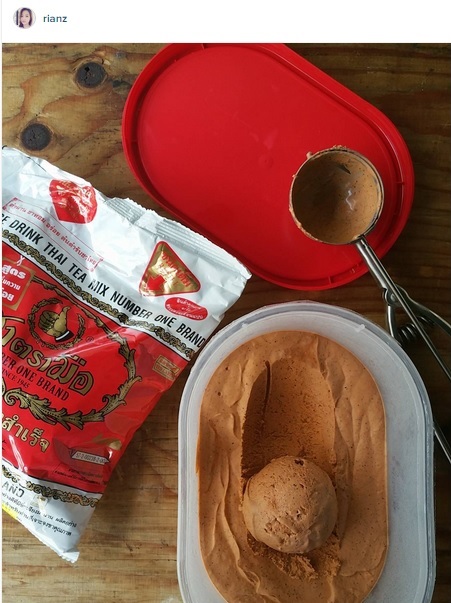
No Churn Thai Tea (Chai Yen) Ice Cream

thai iced tea

Been meaning to try out some no churn ice cream for quite some time, because I can’t seem to bring myself to spend another $300 on a machine I will not be using really often, and also because it requires lesser preparation time.

I’ve quite a number of ice cream flavors I’d really love to try, but first up on the list is Thai Tea Ice Cream. Why? Because I’ve so many friends who are really into Thai food and desserts. 🙂

This recipe yields about 500g worth of ice cream. It isn’t too much, but not too little that it leaves you unsatisfied.

This recipe is adapted from Hot Thai Kitchen She has loads of awesome recipes around, so do try to roam around her site.

INGREDIENTS

  • 295g whipping cream
  • 25g Thai tea leaves
  • A pinch of salt
  • 150g sweetened condensed milk
  • 1.5 Tbsp Irish cream liqueur such as Bailey’s (optional) – (but I’d recommend it, as this is what makes the ice cream smoother)

Optional Topping
3 Tbsp sweetened condensed milk
3 Tbsp evaporated milk


INSTRUCTIONS

Heat whipping cream in a small pot over medium heat, stirring occasionally, until the cream is steaming. Add tea leaves and a small pinch of salt, and stir just until the cream boils. Remove from heat and steep for 5 minutes (don’t leave it sitting until it cools down or it’ll be really hard to strain!). Strain the cream using a fine mesh strainer, pressing out as much liquid as you can—you should have about 230g of cream, if you have too little, add more fresh cream until you have 230g; if you have a little more, don’t worry about it. Once the cream is cool enough to go into the fridge, refrigerate for at least 4 hours or until completely cold. I did this step 1 day in advance.

While the cream is cooling, make the topping by stirring the evaporated milk and condensed milk together. Refrigerate until ready to use.

Once the cream is chilled completely, whip the cream to soft-peak stage using a stand mixer with a whisk attachment or a hand mixer. (When the beaters start leaving a trail that doesn’t immediately disappear, you’re at soft peaks.) Add condensed milk and the Irish cream liqueur and continue whipping until stiff peaks (when you lift your whisk, the peak that forms maintains its shape).

Transfer the ice cream into a metal container and freeze for 2-3 hours or until solid. Alternatively, put the ice cream in between your favourite cookies to make an ice cream sandwich!

Happy making 🙂